Receiving the keys to a newly transformed living space is one of the most rewarding milestones a Singaporean homeowner can experience. Whether you have completely overhauled a mature HDB flat in Toa Payoh or finished a bespoke condo interior design project, the conclusion of hacking and painting feels like crossing a major finish line. The vision you spent months planning with your interior designer is finally standing right in front of you.
However, once the contractors pack up their heavy tools, load their vehicles, and hand over the keys, reality sets in. Homeowners are almost always confronted with a frustrating, pervasive obstacle: a chalky, fine layer of white dust that seems to blanket every square centimeter of the property. It sits heavily on top of your brand-new quartz countertops, clings to freshly painted walls, hides inside wardrobe hinges, and jams the tracks of your sliding doors. You wipe down a surface or mop a floor, only to find a cloudy white film reappearing just a few hours later.
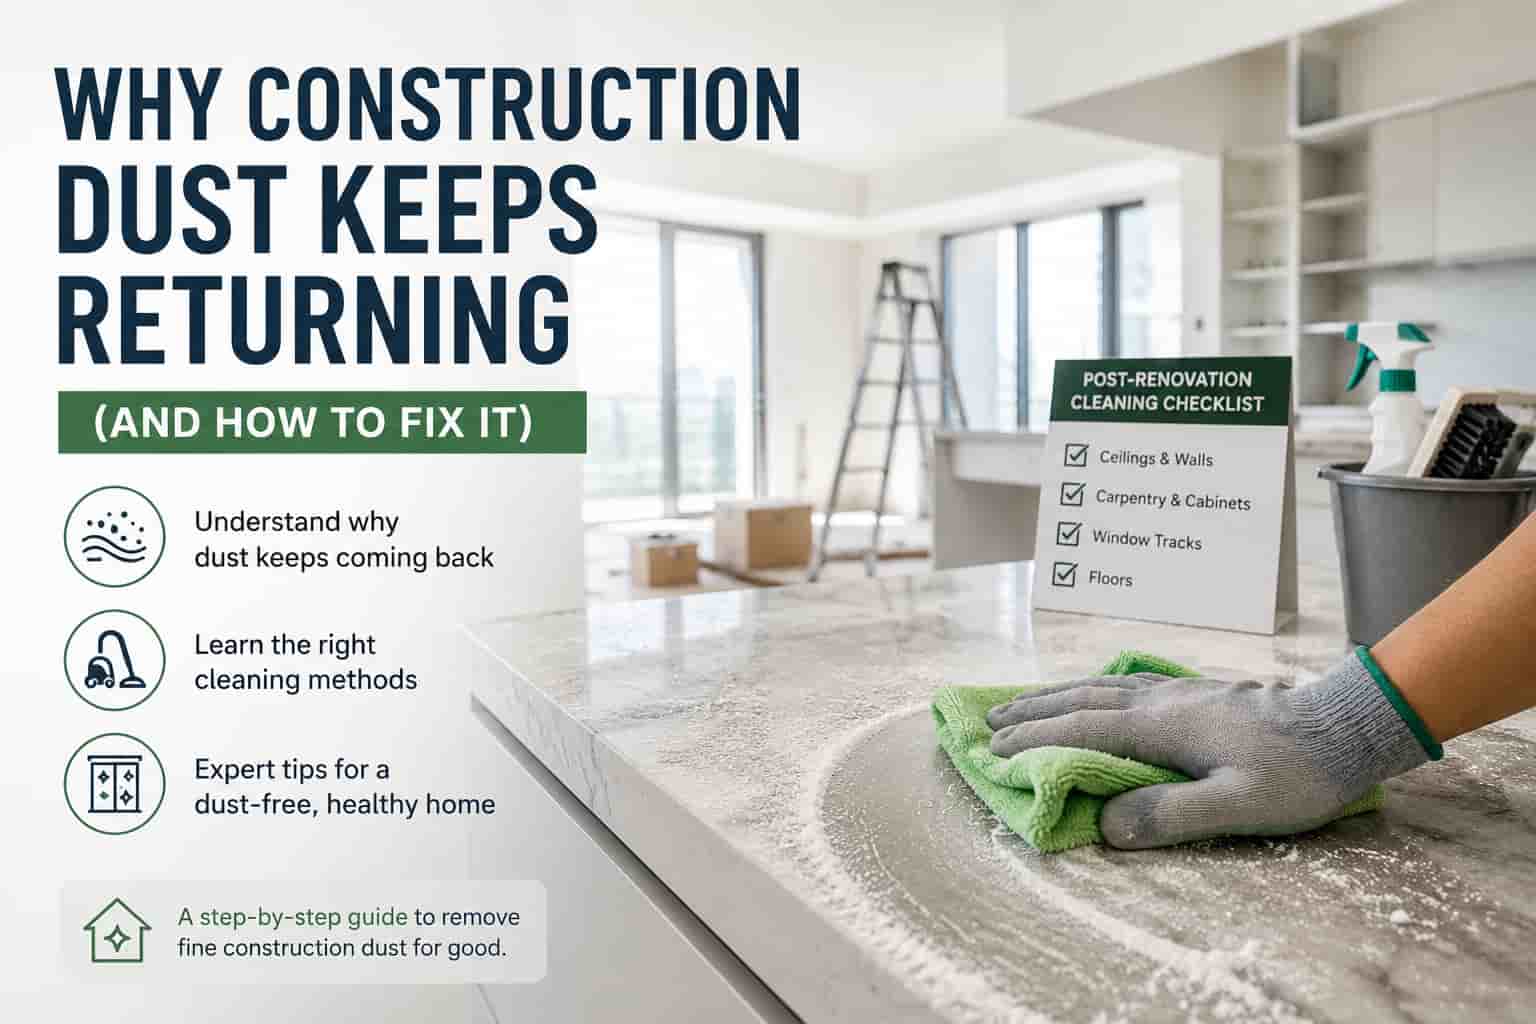
Dealing with a post-construction site requires a completely different approach compared to standard weekend chores. To break the cycle of recurring dust, you must understand the unique physical properties of industrial residue and address your home in a strict, systematic order.
Why Renovation Dust Traps You in a Cleaning Loop
Many homeowners approach a post-con site assuming it can be tackled with standard household equipment. Standard dust is mostly organic matter like skin cells and fabric fibers. Construction dust, by contrast, is a dense, microscopic mix of drywall plaster, cement powder, pulverized grout, silica, and carpentry sawdust.
Because these particles are micro-fine, they carry a high static charge that allows them to cling stubbornly to walls and smooth surfaces. Sweeping with a traditional broom is ineffective; it simply launches the particles back into the air currents, where they float for hours before settling right back onto your floors.
Furthermore, standard household vacuums are ill-equipped for this material. The ultra-fine plaster dust quickly bypasses basic filters, enters the motor housing, and can easily burn out an expensive appliance. To resolve this, you need proper containment, wet-cleaning techniques, and a systematic top-to-bottom strategy.
Phase 1: Preparation and Airflow Management
Before wiping a single surface, you must protect yourself and manage the airflow in your home. Because cleaning stirs up settled particulates, proper personal protective equipment (PPE) is essential.
Wear an N95 Mask: Standard surgical masks leave gaps. An N95 mask blocks microscopic silica and concrete particles from irritating your respiratory system.
Eye Protection: Goggles prevent fine airborne powder from settling in your eyes during long cleaning sessions.
Ventilation Strategy: Open all windows wide to maximize cross-ventilation, and turn ceiling fans on high to push air out of the flat. However, keep your built-in air conditioning units switched strictly off. Running your aircon during a dusty cleanup will suck particles straight into the return vents, clogging the cooling coils and requiring expensive chemical washes later.
Phase 2: The Vertical Downward Sequence
The secret to stopping dust from returning is working from top to bottom, and from the furthest inside room outward toward the main exit. If you are preparing for a major relocation, aligning this process with a comprehensive move in cleaning checklist ensures that falling debris lands only on surfaces that haven’t been treated yet, completely eliminating redundant labor.
Following a top-down sequence is the foundational pillar of clearing out an urban living space. If you ignore the higher ledges and wipe your flat surfaces first, gravity will simply undo your hard work the moment someone walks through the room or adjusts a ceiling fixture.
Ceilings and High Fixtures
Static electricity causes lightweight plaster dust to stick to ceilings in massive, invisible quantities. Use a dry, extendable microfiber mop to sweep across the ceiling. Avoid using water here; wet-wiping raw plaster or un-cured paint can cause permanent smudging. Once the ceiling is dusted, move down to light fixtures, track lighting rails, and the tops of ceiling fan blades.
Wall Cleaning and Paint Care
Wipe down your walls using dry microfiber cloths attached to a flat mop head. Pay special attention to electrical outlets, light switches, and skirting boards, as these horizontal ledges act as primary shelves for falling powder. If you notice pencil marks left by installers, use a barely damp cloth to spot-clean gently. Do not scrub forcefully, as fresh wall paint requires up to three weeks to fully cure and harden.
Phase 3: Hidden Carpentry and Window Tracks
Custom built-in cabinetry is a hallmark of Singaporean homes, but the onsite trimming of laminate wardrobes leaves an extraordinary volume of hidden sawdust trapped in enclosed spaces.
Deep Cleaning Wardrobes and Kitchen Cabinets
To stop dust from venting out every time you open a cabinet, you must systematically clean the dead zones:
Remove Drawers Completely: Pull drawer boxes entirely off their runners. A large amount of heavy sawdust settles in the spaces behind and underneath the drawer tracks during installation.
Vacuum the Shell: Use a vacuum equipped with a soft brush attachment to clear sawdust out of internal corners, shelf peg holes, and hinge wells.
The Damp Wipe: Follow up with a microfiber cloth dampened with clean water. Avoid harsh chemicals or abrasive pads that can scratch high-gloss laminates. Wipe the interior panels, shelf tops, and metal hinges, then leave the doors open to air-dry completely.
Windows and Sliding Tracks
Singapore’s window tracks act as magnets for stray cement drops, plaster splatters, and masonry grit. Begin by using a rigid crevice tool on your vacuum to draw out loose, chunky debris.
For stubborn plaster stuck to the aluminum frame, do not scrape it with a metal knife, which will permanently scratch the powder-coated finish. Instead, apply a warm, damp cloth over the hardened spot for five minutes to soften the binder, then gently dislodge it with a plastic scraper or an old toothbrush. Finish by cleaning the window glass with a squeegee to eliminate leftover silicone smudges or tape residues.
Phase 4: Neutralizing the Floor Haze
Executing a detailed post renovation cleaning routine culminates at the lowest level of the home. Only when every higher ledge, wall, and cabinet carcass has been meticulously wiped should you begin treating your floors. Walking across a floor covered in construction grit acts like sandpaper, causing micro-scratches that permanently dull polished marble, porcelain tiles, or vinyl planks.
The Initial Mechanical Extraction
Never start by mopping a post-renovation floor. Applying water to a thick layer of cement or plaster dust turns it into a milky, abrasive paste that gets pushed deep into grout lines and wood seams, making it twice as difficult to remove. Instead, execute a slow, thorough pass with a high-powered vacuum cleaner across the entire floor plan using a soft-bristled floor tool.
The Double-Mop Method
Once the loose grit is extracted, you can begin wet mopping. Fill a bucket with warm water and a neutral, pH-balanced floor cleaner. Mop a single room using a flat microfiber string mop, rinsing the mop head frequently.
As the floor dries, a faint, cloudy white haze will likely reappear. This is normal; it represents the ultra-fine residual dust lifting out of the microscopic pores of the flooring. To eliminate this entirely, change your mop bucket water, swap to a clean mop head, and perform a second pass with fresh, clear water to neutralize the film.
Knowing When to Call in the Experts
Managing a comprehensive post-con cleanup requires an immense amount of physical stamina and time—luxuries that many busy professionals simply do not have when balancing careers and family commitments. Running back and forth with microfiber cloths while trying to pack and coordinate moving logistics can easily turn an exciting property handover into an exhausting chore.
While a DIY approach is entirely possible with sufficient time, completely neutralizing industrial-grade residue requires specialized machinery, commercial extraction tools, and trained expertise. Professional post renovation cleaning service specialists typically utilize heavy-duty industrial HEPA vacuums and specific surface neutralizers designed explicitly to extract fine construction dust without damaging brand-new, sensitive fixtures. For many homeowners, outsourcing this strenuous phase is the most efficient way to ensure the transition into their new environment is smooth, healthy, and entirely stress-free.
Frequently Asked Questions About Construction Dust After Renovation
1. Why does construction dust keep returning after I clean it?
Construction dust consists of extremely fine particles that can remain trapped inside wardrobes, drawer runners, window tracks, light fixtures, and other hard-to-reach areas. As people move around the home, these particles become airborne again and gradually settle back onto surfaces.
2. Can I remove renovation dust with a normal household vacuum?
A household vacuum can help with larger debris, but very fine construction dust may quickly clog filters and reduce performance. For heavy post-renovation dust, proper filtration and a systematic cleaning approach are important to prevent dust from being recirculated into the air.
3. Why does a white haze reappear after mopping the floor?
The white haze is usually caused by ultra-fine construction dust remaining in the pores of the flooring or grout lines. A second vacuuming and mopping cycle is often required to remove the remaining residue completely.
4. When should I hire a professional post renovation cleaning service?
If your renovation involved extensive hacking, carpentry work, tile cutting, or large amounts of construction dust, a professional post renovation cleaning service can help remove fine debris from hidden areas and prepare the property for comfortable occupancy.
Related Articles To Read
- Cleaning Checklist Before Moving Into A New Home
- 5 Reasons To Hire A Professional Cleaning Service In Singapore For Post Renovation Cleaning
- How Landlords Can Prepare A Rental Unit For New Tenants
- The Move Out Timeline: Why Cleaning Should Always Happen AFTER The Movers Leave
- Move Out Cleaning Checklist For Tenants
- What Lurks After Renovation? A Safe Move-In Guide For Singapore Homes